There are many different ways of upgrading to a newer release but we can categorize them in two different families: 'fresh' and 'package' upgrades."
D. How to upgrade
In this tutorial we'll use a "fresh" upgrade.
D1. Make a backup of your existing system
You need to save your personal data and your software selection: Your personal data, simply because you don't want to lose it... and your software selection, because post-installation you don't want to have to reinstall all the applications you've added to your system.
D1.1 Get a recent version of mintBackup
If you are running Linux Mint 9 or a later version, you can skip this paragraph and move to section D1.2.
If you are running Linux Mint 8, do the following:
- Launch Firefox and go to http://packages.linuxmint.com/list.php?release=Isadora
- Find the line for "mintbackup" and click on "all" in the "DEB" column to download the package
- Once downloaded on your computer, double click the .deb file to install mintBackup.
If you are running an earlier version of Linux Mint (5, 6 or 7), do the following:
- Download mintBackup from here: http://packages.linuxmint.com/pool/romeo/m/mintbackup/mintbackup_2.0.2-mint5-1_all.deb
- Find the line for "mintbackup" and click on "all" in the "DEB" column to download the package
- Once downloaded on your computer, double click the .deb file to install mintBackup.
D1.2 Backup your data
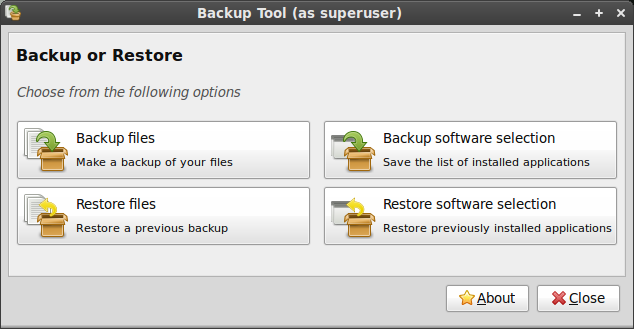
Open mintBackup from the Menu -> Administration -> Backup Tool
Click on "Backup files".
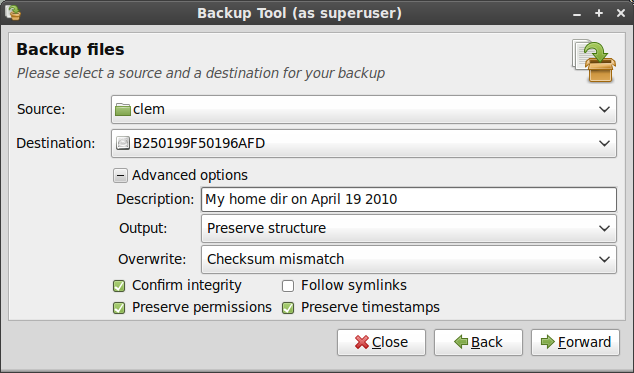
- Select your home directory for the source.
- Select where you want to backup the files as your destination (ideally some external volume since the plan is to format this partition during the installation)
- In the advanced options choose the following:
- A description (that's always a good idea to add to a backup)
- The output format (whether you want to save the backup as a directory, or an archive... archives take longer but if you plan to backup to NTFS/FAT volumes, archives preserve permissions that cannot be preserved by directories on these Windows filesystems)
- Overwrite (you can ignore this setting, it only comes into play if you plan to update an already made backup)
- Confirm integrity: slower but more reliable, it checks the signature of each file after it was backed up.
- Preserve permissions and timestamps: This should be selected.
- Follow symlinks: Not needed.
- Click "Forward"
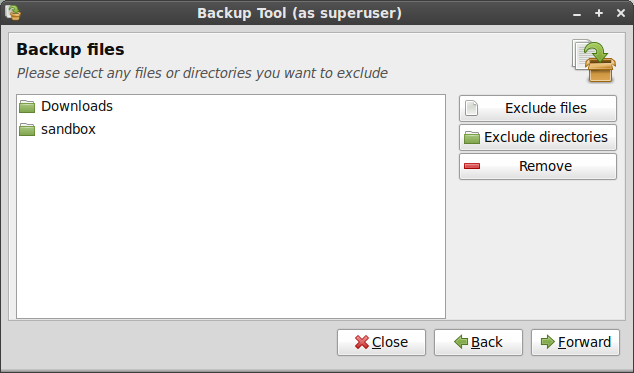
To save space and time, exclude things you don't need. For instance, I don't need to backup my "sandbox" and "Downloads" directories, but that's just me.
When you're ready, click "Forward".
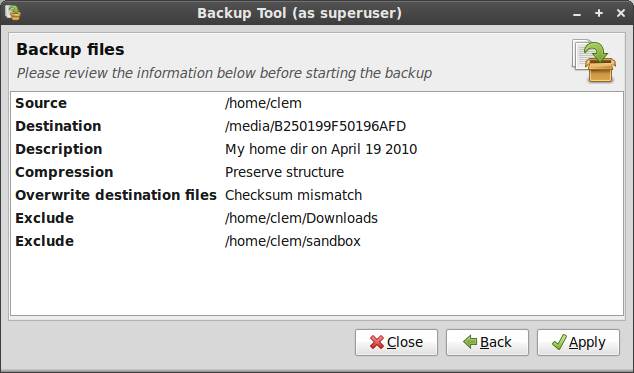
Review the information about your backup and press "Apply".
Note: When the backup is finished. Make absolutely sure to check the result yourself. No matter how much trust you put in the backup tool, head towards the destination, and check that all your files and directories were backed up successfully. If you chose to backup as an archive, make sure to open it up to see if it's working and whether or not it contains everything that it should. The tool is stable, but there can always be a bug or you could have made a mistake... since we're talking about your data here, make absolutely sure before anything else.
D1.3 Backup your software selection
Open mintBackup from the Menu -> Administration -> Backup Tool
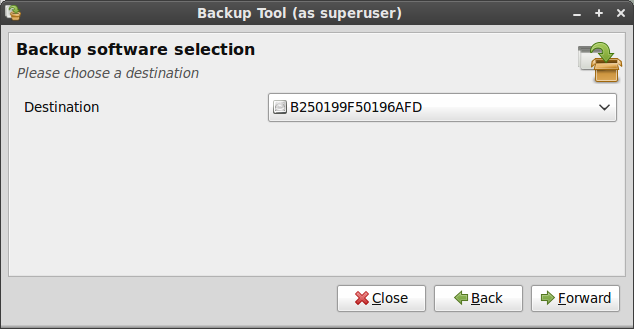
Click on "Backup software selection".
Choose a destination (ideally some external volume since the plan is to format this partition during the installation).
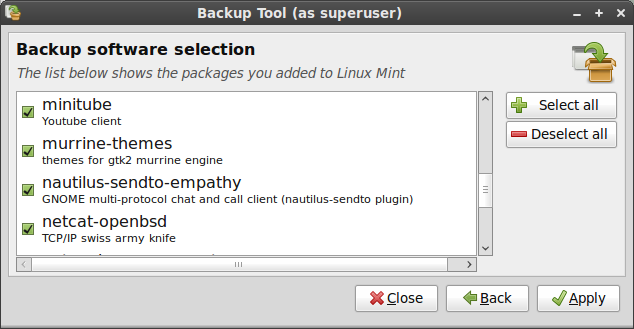
The following screen shows you all the packages you added to your Linux Mint system. Select the ones you want to exclude from your backup and click "Apply".
Note: When the backup is finished (it shouldn't take long), go to the destination and check for a file which name starts with "software_selection". This is the backup of your software selection.
D2. Test and install the newer version of Linux Mint
- Download the ISO for the newer version of Linux Mint.
- Check its MD5 signature.
- Burn it at low speed on a liveCD.
- Boot from the liveCD and select the option "Check disk integrity".
- Boot from the liveCD and select "Start Linux Mint".
- Once on the live desktop, check that your hardware is properly recognized (graphics card, wireless..etc)
- Once you're happy and confident that this newer release is good for you, click on "Install" on the desktop and proceed with a normal installation.
- When asked by the installer, choose "Specify partitions manually (advanced)", select the partition that you used for your current installation of Linux Mint, assign "/" to it, and reformat it to "ext4".
D3. Restore your data and your software selection
D3.1Restore your data
Open mintBackup from the Menu -> Administration -> Backup Tool
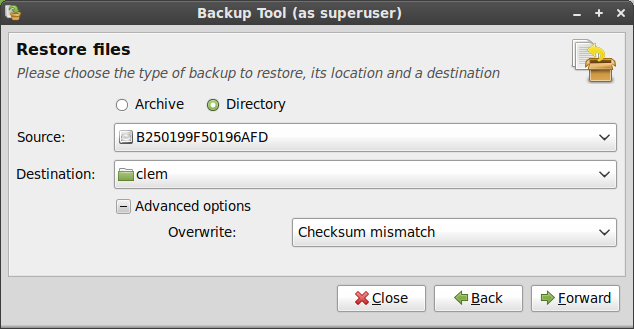
Click on "Restore files".
If you backed up your data as an archive, choose "Archive", otherwise choose "Directory", then point the source to either your archive or the location where you made the backup of your data.
Set your new home folder as the destination.
You can ignore the advanced options since your home folder is empty at the moment. These settings are only there to optimize things for people running regular backups.
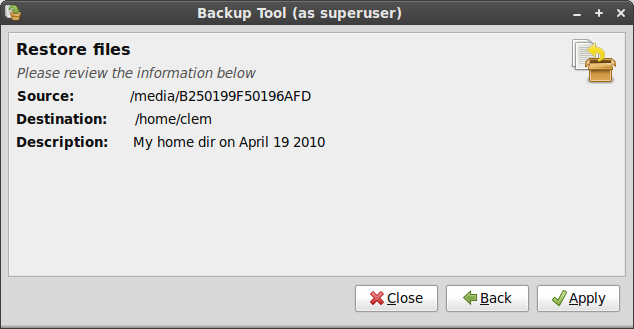
Review the information and press "Apply" when ready.
D3.2 Restore your software selection
Open mintBackup from the Menu -> Administration -> Backup Tool
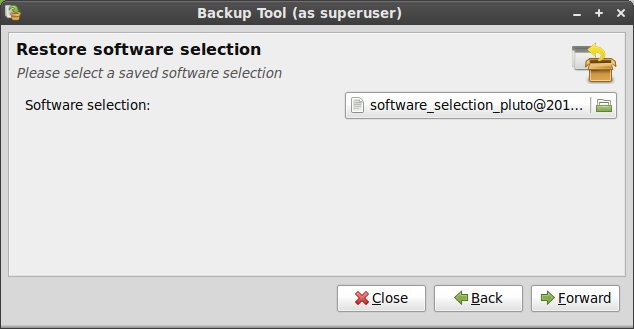
Click on "Restore software selection".
Select your backed up software selection file and press "Forward".
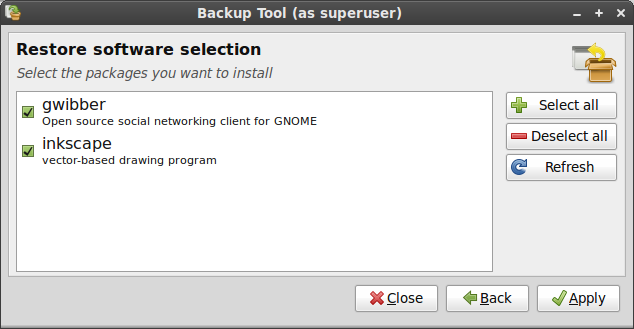
In the next screen you can see a list of packages. Select the ones you want to install and press "Apply".
This list only contains packages which were part of your previous software selection and which are not installed in the present system. The packages which are already installed in your new system don't need to be installed again, so they don't appear in this list.
At any moment, you can press the "Close" button. You don't have to install everything. If you change your mind later on, just launch the Backup tool again and restore your software selection using the same backup, the list will appear and show you the packages you're missing.
If you were using PPA or other repositories and if some of your previously installed packages are not found by the present system, these packages will appear in the list but you won't be able to select them. If that is the case, update your APT sources using the Menu -> Administration -> Software Sources tool to add the missing repositories, then click on the "Refresh" button in the Backup Tool.
Note: The "Refresh" button refreshes the list, not your APT cache. If you update your /etc/apt/sources.list manually, make sure to run "apt update" in the terminal.
Bigg Boss Live
ReplyDeleteBhoothnath Night Chart
Everything is very open and very clear explanation of issues. was truly information. Your website is very useful. Thanks for sharing.
ReplyDeleteBigg Boss 11